The Difference Between Hydroponics And Soil-Based Gardening

Hydroponics and soilbased gardening both let you grow your own food at home, but the methods and results can look surprisingly different. For anyone curious about how these systems work, and more importantly which one is a better fit for your needs, it’s pretty helpful to know what really sets hydroponics apart from classic soil gardening. I’ve had quite a few plants in both, and there’s a lot that goes on beneath the surface, sometimes literally.

A vibrant hydroponic system and a lush soil garden side by side in a greenhouse

What Makes Hydroponics and Soil-Based Gardening Different?

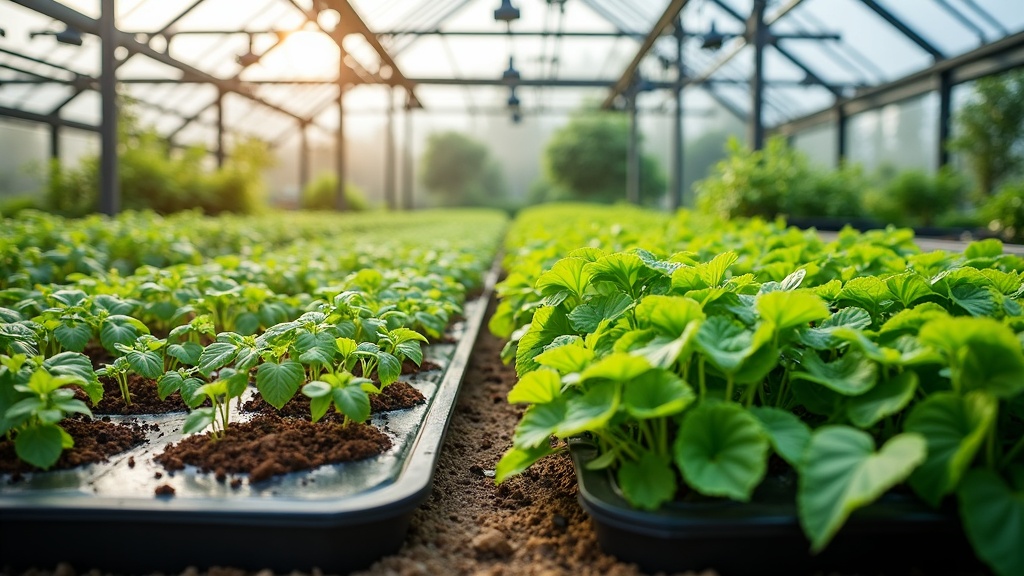
At the heart of it, hydroponics is all about growing plants without any soil at all. Instead, plants soak up nutrients through a water-based solution. Classic gardening, on the other hand, relies on soil as both a physical support and a source of nutrients. While both systems can be used for everything from leafy greens to tomatoes, the approach you choose affects everything from daily care to growth speed.

Hydroponic gardening has been around for thousands of years, though it’s only in the last few decades that the technology and equipment have reached the general public at home. Meanwhile, soil-based gardening is, well, as old as agriculture itself. You can do classic gardening almost anywhere outdoors, and sometimes indoors with good lighting. Hydroponics often requires equipment like water pumps, grow lights, and trays, but many kits make it easy for beginners to get started. Plus, today’s hydroponic options can be surprisingly compact, making them a solid pick for city dwellers with limited space. Soil-based gardening, on the other hand, provides a more hands-on, earthy feel that many gardeners really enjoy.

Core Concepts: How These Growing Systems Actually Work

There are a few key terms you’ll hear again and again if you look into hydroponics or soil gardening. Here are some basics to clear things up:

  • Nutrient Solution: In hydroponics, this is basically the plant’s food, dissolved in water. You measure or mix it to make sure your plants get exactly what they need.
  • Growth Medium: Instead of soil, hydroponic roots often grow through a neutral material like clay pebbles, perlite, or rockwool. This keeps the plant in place and lets water flow through easily. In soil gardening, the soil itself handles both tasks.
  • pH Balance: Both systems need attention here. Plants are picky about pH; hydroponics makes it a little easier to adjust things quickly, while soils often buffer changes more slowly.
  • Microbes and Soil Life: In soil, beneficial microbes break down organic material and help roots get nutrients. Most hydroponic systems skip this, but some advanced ones add beneficial bacteria directly to the water.

Grow Steps: Starting With Hydroponics vs. Soil Gardening

Getting started looks a bit different between the two styles. Here’s a quick overview to get you set up:

  1. Pick Your Growing Space: Both methods can work indoors or outdoors. Hydroponics often works well in smaller spaces or even on shelves, while traditional gardening usually needs a patio, a yard, or large pots. Keep in mind, the amount of ambient light available can make a big difference for both methods, and supplementing with LED grow lights can benefit your plants indoors.
  2. Set Up Supplies: For hydroponics, you’ll need a container, plant trays, water pump (for some systems), nutrients, and often a timer for lights or pumps. For soil gardening, just solid pots and potting mix are enough to get you started. Many beginner hydroponic kits package most of these things together, saving you the trouble of piecing everything out separately.
  3. Start Your Seeds: You can kick things off in seedling plugs or straight into soil. Hydrated plugs or peat pellets work great for both methods. Transfer young plants once roots begin to show.
  4. Care Routines: Hydroponics requires consistent monitoring of water levels and nutrients, and may require occasional cleaning. Soil gardening relies on regular watering, pest checks, and occasional fertilizing. An important distinction is that hydroponics usually requires more frequent adjustments to the nutrient mix and pH, while soil gardening may rely more on slow-release organic fertilizers and periodic compost amendments to maintain healthy soil over time.
  5. Harvest Time: You’ll probably notice that hydroponic veggies can mature faster than soilgrown ones, but the routine is pretty much the same; pick and enjoy when ready! Just be sure to replant or start new seedlings soon after harvesting for a continuous supply.

Treating gardening like a steady routine makes both options easier, but hydroponics in particular really benefits from a bit of daily attention. With both methods, keeping a journal or notes on your plant progress can help spot trends and catch any minor problems while they’re still easy to address.

Things to Consider Before Choosing Your Gardening Method

Bouncing between hydroponics and traditional gardening, you’re going to notice pros and cons on each side. Your space, your patience, and even how involved you want to be all play a role in the best choice for you.

  • Initial Cost: Hydroponic setups cost more upfront, especially if you use automated systems and lights. Soil gardening can be practically free with some recycled containers and a bag of potting mix. If you like to tinker or enjoy new technology, hydroponics can feel especially rewarding.
  • Upkeep: Hydroponic systems ask for more attention to details, such as checking water, cleaning, and mixing nutrients, but less weeding or working the soil. Soil gardens require less tech but more hands-on work, such as digging, mulching, and pest control. The type of plants you want to grow may tip the scales here—delicate greens do great in hydroponics with attentive management, while hardier veggies thrive in soil.
  • Pest and Disease: Hydroponics tends to have fewer pests, like slugs or soil fungi, but water can spread root issues quickly if you’re not watching. Soil-based gardening fights more pests and weeds but is less likely to lose an entire crop overnight. Still, keeping an eye out for sudden wilting or strange leaf spots pays off for both methods.
  • Environment: Soil gardening allows for more natural rooting and a classic “earthy” feel. Hydroponics saves water and can often be done in small, urban spaces. Each system’s better in different places; hydroponics is handy for apartments, and soil gardens are easier on a backyard plot. Consider your available time and the effort you want to put into your garden each day before making your decision.

Hydroponics and Water Usage

Hydroponic systems actually use much less water than soil systems, since the water in the tray or tank is recycled repeatedly. If you live somewhere dry, this can make a real difference in how much maintenance you have to do and in your water bill. Soil gardens let more water escape through evaporation and runoff, especially if you’re growing outdoors. In fact, drought-prone areas often benefit most from hydroponic techniques, as they can reduce overall water consumption by up to 90% compared to traditional dirt gardens. Installing a simple rain barrel or drip irrigation system in soil gardens can help conserve water, too.

Nutrient Control and Plant Growth

Having more precise control means hydroponic plants usually grow a bit faster and taller, given ideal conditions. This is because roots don’t have to search for nutrients; everything’s served right to them. In soil, plants develop bigger, more robust roots as they search and forage more. The product flavor can sometimes differ between the two; some folks think soil-grown tomatoes taste sweeter and herbs have a more complex flavor, while hydroponics gets you clean, crisp veggies in less time. However, in either method, choosing high-quality seeds and maintaining the right environment will yield delicious results. Gardening in both media also lets you experiment to figure out your own taste preferences!

Advanced Tricks: Getting More from Your Garden

As you get comfortable with your gardening, you can crank it up a little. Here are some ways to get more out of either setup:

Mix Methods for Better Results: You can actually use both techniques if you have space. Try hydroponically growing herbs and leafy greens for superfast harvests, and root veggies or big plants in soil beds. This combination allows you to use space efficiently while growing a more diverse crop selection.

Monitor and Adjust: In hydroponics, having a pH and EC meter is super handy. Catch any issues early, like yellow leaves or stunted growth, and tweak your nutrient mix on the spot. In soil, compost, and organic matter add long-term fertility, so don’t toss those kitchen scraps. Setting up a compost bin for your soil garden gives you a free source of nutrients while helping reduce waste.

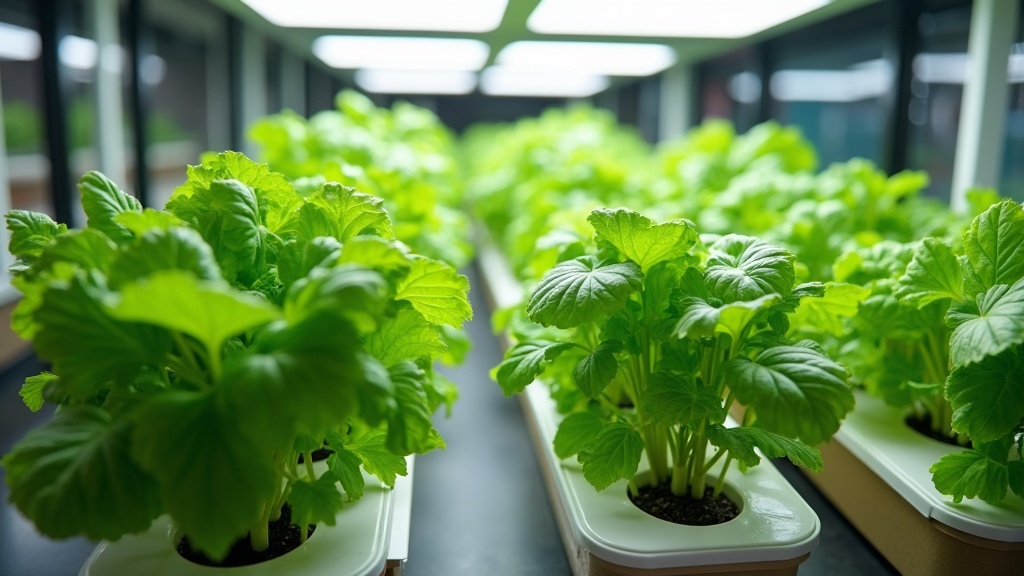
Go Vertical or Indoor: Hydroponics lets you go up instead of out. Stacking shelves, hanging towers, or window gardens make use of tight spaces. For soil gardeners, raised beds, pots, or even hanging baskets can stretch your space and make things more manageable. Innovation in hydroponic and soil containers has made small-space gardening easier than ever, so don’t hesitate to get creative with your layout.

Each method rewards paying attention to your plants; spotting problems early means healthier, more reliable harvests. Keep experimenting, and don’t be afraid to try new plant varieties or alternate between hydroponic and soil setups to see what you enjoy most.

Beginner-Friendly Plant Choices: Where to Start

Picking the right crops gets things off to a strong start. I’ve found these choices are forgiving and give you quick results, which boosts your confidence to try tougher ones later:

  • Hydroponics: Lettuce, spinach, bok choy, kale, basil, and mint grow like crazy with just a little practice. These plants don’t need deep root systems, making them ideal for simple hydro setups and rapid growth cycles.
  • Soil: Tomatoes, peppers, beans, carrots, and cucumbers are classics for the backyard or patio gardener. They generally grow stronger in a loose, nutrient-rich bed and offer the satisfaction of picking vegetables right off the vine or bush.

Leafy greens are especially beginner-friendly in water, while soil is better suited to crops like potatoes and carrots that need room to spread below ground. Think about your taste preferences and available space before picking seeds, and remember that starting small is usually the key to success.

Frequently Asked Questions

If you’re new, you probably have a few things on your mind. Here are some questions I often hear:

Q: Which system is easier for beginners?
A: Soil gardening is often simpler for true beginners, since it’s so forgiving and needs less gear. Hydroponics gets easier with a good starter kit, though, and once you’re set up, the routine can feel pretty easy. People who like tinkering with gadgets often enjoy playing with hydroponics, but starting with soil rarely feels overwhelming.


Q: Does hydroponics really grow plants faster?
A: Yes, in most cases. Hydroponic systems give roots everything they need right away, so growth rates can be noticeably higher, especially for greens and herbs. Fast growth is one of the main reasons people stick with hydroponics after they try it.


Q: Can I grow anything hydroponically?
A: Most leafy greens, herbs, and even tomatoes or peppers can do great in hydro setups. Big root crops like potatoes or carrots are trickier, but some people pull it off with large vertical systems. Still, crops that prefer drier conditions or require tuber development usually do best in soil setups.


Q: Is food grown without soil as nutritious?
A: The nutrition depends a lot on the nutrients you add in hydroponics. When done right, hydroponics can produce crops just as healthy as those grown in soil. The flavor may be a little different, but there’s no significant nutritional gap. Make sure to use a quality nutrient mix, and you’ll keep your homegrown veggies packed with vitamins and minerals.

Wrapping Up

Both hydroponic and soil gardening make it possible to grow fresh food at home, each with its own quirks and rewards. Whether you’re looking for speed and control or you love the tactile experience of working with soil, either option lets you get growing and build up your gardening skills. Start with what feels comfortable, and branch out as your confidence grows; there’s a place for both methods in anyone’s home garden. Over time, you might find yourself switching things up and enjoying the best of both worlds as you try new plants and techniques.

Maintaining Your First Hydroponic Garden: What To Expect

Growing your first hydroponic garden is an exciting way to grow plants, especially if you love fresh veggies or want a fun home project. Hydroponics removes soil from the equation and puts your plants in a nutrient-rich water solution. Keeping everything running smoothly is easier with the right info and some practical tips. Let’s get into what you can expect as you jump into maintaining your first hydroponic setup.

Hydroponics setup with lush green leafy vegetables, nutrient reservoir, and LED grow lights in a home environment.

Hydroponic Garden Basics: What You Need to Know

Hydroponic gardening is gaining popularity fast, and you can see why. These systems let you cultivate healthy plants without the usual dirt, and you don’t need a huge garden plot either. Before you start with maintenance, it’s a good idea to check out how hydroponic systems work.

The most common types of hydroponic systems include nutrient film technique (NFT), deep water culture (DWC), and drip systems. They’re a little different from each other, but all depend on water, nutrients, and something sturdy to support plant roots, such as clay pellets or foam plugs. Since you control nearly everything—nutrients, lighting, and temperature—it’s more hands-on, but you enjoy faster growth and fewer pest headaches. Plus, you can garden year-round indoors, making it a great choice if you have limited outdoor space or unpredictable weather.

Setting Expectations: Maintenance Tasks in Hydroponics

Tending to daily and weekly care helps your hydroponic garden thrive. Here’s what to expect with your first setup:

  • Checking Water Levels: Keep roots moist by making sure the reservoir has enough water. This keeps the plants from drying out and supports steady growth.
  • Measuring Nutrient Strength: Plants drink up nutrients quickly. Use a measuring tool (such as an EC meter) to see what’s left and top up as needed. Consistent checking helps prevent deficiencies before they start.
  • Monitoring pH: The best absorption happens at specific pH levels, usually 5.5 to 6.5. pH up or pH down solutions make it easy to get in the sweet spot.
  • Cleaning Parts: Pumps, tubes, and reservoirs can build up algae or minerals. A weekly rinse and wipe prevent clogs and help water circulate smoothly.
  • Observing Plant Health: Checking for color changes, drooping, or pests lets you jump in quickly if something seems off.

Don’t worry if this sounds like a lot—the routine quickly becomes second nature, especially as you get used to your system.

Daily and Weekly Hydroponic Routines

Adopting a simple routine goes a long way. Here’s a breakdown:

  • Daily: Glance at the garden to ensure water is circulating, lights are on, and that there aren’t any leaks or spills. Take a quick look at the plants to spot wilting, color changes, or insect damage.
  • Weekly: Take a closer look at the nutrient solution and pH levels, clean off visible algae, and swap out reservoir water if it’s starting to look or smell odd. Flush the system when necessary. These steps take little time with practice.
  • Monthly: Fully empty, clean, and refill the nutrient reservoir. A good flush wipes out old residue and gives your plants a clean environment. Deep cleaning can also prolong the life of pumps and hoses.

Extra tip: If you get into the habit of logging what you do, you can spot issues and catch trends that help your plants thrive. Many growers keep a simple notebook or use a phone app to track pH readings, water top-ups, and cleaning dates.

Things to Watch Out for in Your First Hydroponic Garden

Most new hydroponic growers bump into a few issues. Here’s what to expect and some advice on dealing with them:

  • Algae Growth: When light reaches your nutrient solution, algae can set up shop and clog tubes. Blocking out light with opaque covers or black tape helps, but nothing beats a regular cleaning schedule.
  • Root Rot: Slimy, brown roots are trouble—often a sign they’re suffocating. Make sure air stones or pumps run well and deliver enough oxygen, especially in deep water culture systems.
  • Nutrient Deficiencies: Watch for yellowing, curling, or spotty leaves. Adjusting the nutrient mix and balancing the pH should set things right pretty quickly.
  • Pests: Bugs aren’t as common indoors, but aphids and spider mites might still show up. Check leaves regularly and use gentle sprays rather than harsh chemicals if you spot any.

More About Water and Nutrient Management

The quality of your water makes a real difference in hydroponics. Tap water can contain minerals or chemicals that might mess with your nutrient mix. Many people opt for filtered or reverse osmosis water to avoid this, especially for sensitive plants. Testing your tap water ahead of time lets you decide if simple topping up will do, or if an extra filter is worth installing.

Nutrient formulas for hydroponics include everything your plants need instead of what they’d pull from soil. This usually means keeping track of levels of nitrogen, phosphorus, potassium, calcium, and important trace minerals. The blend you use depends on your plant’s growth stage—leafy greens and herbs want high nitrogen, while fruiting plants like peppers and tomatoes prefer extra potassium and phosphorus as they mature. Follow the label guidelines, but don’t hesitate to tweak based on your plants’ appearance.

It’s also good to remember that water temperature matters; most plants like nutrient solutions between 65°F to 70°F. Too warm and you might get root rot, too cold and your plants grow slowly. Small aquarium thermometers are cheap and make it easy to check water temps at a glance.

Equipment and Tools That Make Life Easier

A few basic tools will give your maintenance routine a boost. Here’s what to have on hand:

  • pH Testing Kit or Digital Meter: These give instant pH readings. The digital ones are easier for repeated use, though the basic chemical kits are fine for beginners.
  • EC or PPM Meter: Nutrient strength matters. These meters let you spot if nutrients are too weak or strong before leaf problems show up.
  • Plug Timers: Timers for lights and water pumps take the guesswork out, so your system runs consistently even if you forget.
  • Extra Pump or Air Stone: Having a backup on hand can save your plants if part of your setup stops working unexpectedly.

Other handy items include disinfectant wipes for cleaning, a measuring jug for mixing solutions, a notebook, and maybe a magnifying glass to inspect leaves for bugs or spots.

Lighting and Temperature Needs

The beauty of hydroponics is controlling your growing environment. Most hobby setups use LED grow lights hung above plant trays. These lights are energy efficient and stay cooler than fluorescent or incandescent bulbs, reducing the risk of burning leaves. As plants grow, move the lights higher to prevent stretching or scorching. Most herbs and veggies prefer about 12-16 hours of light each day, which can be handled automatically with a timer.

Ambient temperature is just as important—keep your grow area between 65°F and 75°F. If things get too hot or cold, growth slows and your plants won’t thrive. Simple room thermometers make it easy to keep an eye on temperature swings, especially if your system is in a basement or attic.

Frequently Asked Questions About Hydroponic Maintenance

People new to hydroponics often have a bunch of questions. Here are some that come up a lot:

Question: How do I know if my nutrient levels are off?
Answer: Plants will usually let you know something isn’t right—look for yellow, curled, or browning leaves. Using an EC meter gives you a quick way to check if your mix is too strong or not strong enough, fixing issues before they get worse.


Question: How often should I change my water?
Answer: Most growers swap out the nutrient solution every two or three weeks, but top-ups are needed as water goes down. Once a month, do a full clean and refill to keep everything healthy.


Question: Should I worry about bugs in a hydroponic system?
Answer: You’ll have fewer pests than a traditional garden, but it’s smart to check your plants a couple of times a week. If you spot bugs, a plain water rinse or mild soap spray usually gets rid of them fast.


Question: What’s the best starting crop for beginners?
Answer: Leafy greens like lettuce, kale, and basil are the easiest. They don’t need much support, grow quickly, and can recover from small mistakes.


Wrapping Up: Getting Confident with Hydroponic Garden Maintenance

Handling your first hydroponic setup is all about forming easy daily and weekly habits that soon feel effortless. Keeping the system tidy, watching nutrient and water quality, and making quick fixes ensures your plants grow strong. Hydroponics is fun and interactive, and you’ll pick up confidence—and tasty produce—faster than you think. Once you’re comfortable, try out new crops or scale your system a little. Enjoy the adventure of seeing your plants do well!

Easy DIY Hydroponic Projects For Beginners

Getting into hydroponics opens up a whole new way to grow plants, especially if you don’t have much outdoor space or soil to work with. Hydroponic gardening uses nutrient-rich water instead of soil, and it’s surprisingly accessible, even if you’re just starting out. I’ve found that building your own basic hydroponic setups is a great way to learn, save some cash, and figure out what works best for your space. This guide covers some fun, simple hydroponic projects that are perfect if you’re a total beginner. Plus, it’s a rewarding hobby that can bring fresh produce to your table with just a bit of care and curiosity.

Various easy DIY hydroponic setups on a wooden table, including a mason jar system and a simple pipe system with healthy green plants.

Why Try Hydroponics at Home?

Hydroponics might sound high-tech, but at its core, it’s just a way to give plants the nutrients they need through water rather than soil. There are some real perks to growing this way:

  • Saves space: You don’t need a big backyard. Hydroponic gardens fit on shelves, window ledges, or balconies.
  • Faster growth: Plants often grow quicker because nutrients go directly to the roots.
  • Less mess: No digging or dealing with tricky soil issues like pests or weeds.
  • Water efficient: These systems use less water than traditional gardens, since the water gets recycled.
  • Flexibility: You can move your garden around your home easily and experiment with different spots for sunlight or warmth.

Small hydroponic setups are a smart way to grow herbs, greens, or even a few strawberries indoors. It makes gardening more doable year-round, and if you enjoy tinkering or DIY projects, you’ll probably find it pretty fun, too.

Basic Equipment and Supplies for DIY Hydroponics

Before putting together your own hydroponic system, it helps to know the main supplies you’ll need. You can keep things really basic at first.

  • Containers: Mason jars, plastic tubs, buckets—just about any clean container that can hold water works.
  • Growing medium: Replaces soil; popular options are clay pellets, rockwool, or even aquarium gravel.
  • Nutrient solution: A mix of water and plant food specially made for hydroponics. This is what your plants will “eat.”
  • Net pots: Small baskets or cups with holes, helping roots grow out and reach the water below.
  • Air pump or bubbler (optional): For most basic setups, especially with greens, you don’t need an air pump. It can help oxygenate the water and keep roots happy in some systems.

You might also want a small grow light if you’re working with limited sunlight, but for most leafy greens and herbs, a sunny windowsill does the job. Having a basic timer can also help automate lighting if you decide to use artificial lights later on.

Three Super Easy DIY Hydroponic Projects

Starting simple is the way to go. Here are three classic projects that are easy to build, affordable, and perfect for beginners. They don’t need fancy gear and use supplies you probably already have around your home.

Mason Jar “Kratky” Hydroponics

The Kratky method is one of the simplest hydroponic systems you can try. No pumps or electricity required; just let your plants’ roots dangle into the nutrient water and watch them grow.

  • Take a large mason jar or another glass container.
  • Mix up your nutrient solution and fill the jar about three-quarters full.
  • Place a net pot with your plant seedling in the jar so the roots touch the water.
  • Use a small piece of cardboard or black paper around the jar to block out light (this keeps algae away).

Herbs like basil, mint, or lettuce do great in these single-plant jars. You get quick results and can line up a few for a neat countertop garden. This is an awesome way to get fresh greens at your fingertips, and kids enjoy seeing roots stretch down into the water day by day.

Simple Tote Bin System for Leafy Greens

This project is beginnerfriendly but lets you grow several plants at once. You’ll need a plastic storage bin (around 10-20 liters/2-5 gallons is perfect), a drill, and a handful of net pots.

  • Drill holes in the lid of your plastic bin, spaced out so each plant has room to grow.
  • Fill with the nutrient solution, then pop net pots with seedlings into the holes.
  • Place the lid on and you’re good to go.

Some people add a small aquarium bubbler for extra oxygen, but it’s not required for quick growers like lettuce. This setup is awesome on a sunny balcony or inside by a bright window. You can boost your harvest by starting new seeds in a second bin, rotating crops as you go.

Bottle Hydroponics: The Ultimate Upcycle

If you want to keep things super cheap and ecofriendly, turning old plastic bottles into hydroponic planters is a neat trick. Here’s what I do with a 2-liter soda bottle:

  • Cut the bottle about a third from the top to make two pieces.
  • Invert the top so it sits inside the bottom, forming a funnel.
  • Add water and nutrients to the base.
  • Put a seedling in a net pot or a mesh cup in the top part, with roots dipping into the solution.

This quick build is great for testing out hydroponics before investing in bigger systems. Plus, you’re saving plastic from the trash while growing fresh herbs. It’s also easy to set up several bottles on a windowsill for a mini herb garden, and you can gift one to a friend to spread the love for growing at home.

Common Beginner Mistakes (And How to Avoid Them)

Most people (myself included) make a few missteps when starting with hydroponics. Here are some things to watch out for, along with ways to keep your setup running smooth.

  • Overfeeding nutrients: More isn’t always better. Stick to the instructions on the nutrient bottle to avoid burning your plant roots.
  • Too much sun or heat: Intense sunlight can heat up water and hurt roots. Move setups out of direct, harsh sunlight, or set up a fan where possible.
  • Not checking water levels: Water can evaporate fast indoors. Top up containers every few days, especially in warm rooms.
  • Ignoring root rot: Yellowing, mushy roots mean a lack of oxygen or too much water. Keeping the waterline a little below the crown of the rootball helps prevent this.

Checking on Plants Regularly

A quick daily glance helps spot issues before they get out of hand. If leaves are droopy or pale, check nutrient levels, water quantity, and look for signs of disease or algae. Sometimes a small adjustment, like moving the jar or adding fresh water, can help plants bounce back quickly.

Water Changes Are Key

Changing out the water and rinsing containers about every two weeks stops gunk from building up and keeps plants healthier. It only takes a few minutes and can make a noticeable difference. If you notice algae starting to appear, it’s definitely time for a change; keeping things clean helps your hydroponic adventure flourish.

Supplemental Tips: Getting the Most Out of Your DIY Hydroponic Garden

Learning a few tricks makes a difference in how well your plants do in a home hydroponic system. These extra tips can really give a boost to your success rate:

  • Start with easy plants: Leafy greens like lettuce, spinach, and herbs such as basil and cilantro are practically made for hydroponics. Save tomatoes or peppers for when you’re more experienced.
  • Label your containers: Especially useful if you’re growing several varieties. It’s easy to forget what’s what if they look similar as seedlings.
  • Clean everything in between grows: Always give containers and growing media a good rinse before starting something new to prevent any carryover of pests or algae.
  • Keep an eye on temperature: Most hydroponic plants like water temps in the 65–75°F (18–24°C) range. Really hot or cold water stresses roots.
  • Use gentle airflow: A small fan near your plants helps keep humidity in check and strengthens stems, making healthier herbs and greens overall.

Real-Life Uses: How Home Hydroponics Fits the Everyday Gardener

Home hydroponic kits might seem like something just for techies, but there are lots of everyday reasons people try them:

  • Small apartments: No soil or heavy lifting. Hydroponics tucks onto shelves or windowsills where pots can’t.
  • Fresh herbs all year: Grocery store herbs last a week or two, but homegrown ones just keep on coming as you snip off what you need.
  • Teaching tool for kids: Building a simple setup together is a hands-on way to learn about plants and science.
  • Reducing food waste: Grow what you need when you need it instead of buying in bulk and tossing leftovers.

Growing lettuce or basil in mason jars on my kitchen countertop means I have fresh flavor right at my fingertips and way less waste in the long run. Plus, it creates an inviting kitchen atmosphere where greenery adds a splash of life. Some folks even find hydroponics helps them eat healthier since homegrown greens are always within reach.

Frequently Asked Questions

Here are some common questions I get from people starting out with hydroponics:

Question: Do I need fancy gear or a big budget to get started?
Answer: Not at all. Some of the best first projects cost just a few dollars, especially if you reuse containers you already have. If you get creative, you can often set up your first system with things sitting in your recycling bin.


Question: How much effort does a hydroponic setup require every day?
Answer: Just a few minutes. Check water levels, eyeball your plants, add a little more nutrient if needed, and you’re done. The main thing is to check in regularly without feeling overwhelmed by daily chores.


Question: Can I use tap water for my hydroponic system?
Answer: Most tap water is fine for leafy greens and basic herbs, but if you notice issues, you can let water sit out for a day or use a cheap filter to remove chlorine. Some plants are pickier, but for starters, you’ll probably do just fine with regular tap water.


Ready to Get Growing?

Taking the DIY route with hydroponics is a low-stress way to grow more of your own food indoors, even with zero experience. Once you nail the basics, you can experiment with bigger or automated systems and a wider range of plants. Starting small makes learning fun, gives quick results, and brings a bit of garden green into your everyday life. Bottom line: Hydroponics lets you grow fresh food at home, sparks curiosity, and keeps things interesting even if you don’t have a backyard. So grab a jar, bottle, or bin and kick things off—your homegrown harvest is just a few simple steps away.

All About Plants

HOW TO PLANT LETTUCE

The plant we’re going to talk about today is lettuce. How to plant leaf lettuce and how to care for leaf lettuce.

My favorite leaf lettuce is Buttercrunch or Red Sail. Although there are different kinds of lettuce, these two are my favorites.

Lettuce is a cool weather plant, meaning it does not like a lot of heat. Heat will cause the lettuce to “bolt” which means it grows flower-like blooms and gets strong and bitter. Lettuce grows best in full sun in loose, nitrogen-rich soils. You can also get a head start by planting seeds inside.

WHEN TO PLANT LETTUCE

As soon as we think we’ve gotten the last frost, we plant our leaf lettuce plants in a flower bed next to the house on the southern side of the house. It’s a good place to plant the first crop since it’s too early to plant flowers. If a very cold night is forecast, we cover them with old hanging flower pots that we saved from the year before. We are able to plant two crops before it gets too hot.

We also plant each group of six plants about two weeks apart so we can enjoy the lettuce for a longer period.

Once it starts growing, we have more lettuce than we can use. So our neighbors and relatives also enjoy our bounty.

HARVESTING THE LETTUCE

We pick the lettuce and leave the plants to continue producing. Some growers wait until the stalk is full and cut the entire stalk but we like the individual leaves. I put the leaves in ice water for a few minutes to clean it or run it under very cold water if I’m in a hurry. I purchased a lettuce dryer, then spin the water off the leaves, put the lettuce in Ziploc baggies, push most of the air out before closing the bag. The lettuce lasts for several days in the refrigerator.

DIFFERENT TYPES OF LETTUCE

There are several types of lettuce, but three (leaf, head and romaine) are the most common.

  • Leaf lettuce – this type has loosely bunched leaves and is a very popular variety. It is used mainly for salads.
  • Romaine lettuce – This is the most often used lettuce in Caesar salads. Used mainly for salads and sandwiches, this type forms long, upright heads.
  • Iceberg lettuce – this is the most popular type in the US, it is low in flavor and nutritional value.
  • Butterhead lettuce – Is known for its sweet flavor and tender texture. Also known as Boston or Bibb lettuce, this type is a head lettuce with a loose arrangement of leaves.

These are just a few of the different varieties of lettuce.

PESTS/INSECTS

Many insects are attracted to lettuce, including cutworms, wireworms, nematodes, aphids, leafhoppers, thrips, leafminers, and flea beetles. Our problems seem to come from the slugs and snails, which cut large holes in leaves. Rabbits and groundhogs, also eat the plants. We struggle with the rabbits but not so much with the groundhogs until we plant vegetables in the main garden. Then the groundhogs have a feast along with the rabbits.

That’s it for today.

CHECK BACK WITH US OFTEN FOR MORE…“ALL ABOUT PLANTS”.


Planting Your Garden In A Small Area

No matter how small your garden or other area around the yard, you can grow more by growing vegetables vertically. Growing vegetables in a small space is much easier when you grow them vertically. There are other ways to grow vegetables in small spaces but I especially like growing them vertically if they are capable of vining.

Grow the veggies that take up a lot of ground space and are capable of  vining– such as tomatoes, pole beans, peas, squash, melons, cukes, and so on.

These can be supported by trellises, fences, cages, or stakes.

Vertical vegetable growing helps the vegetable produce more abundant and straighter vegetables.

 Vines grow straighter due to gravity. Less pest damage, abundant foliage protects from sunburn, takes up less space so there’s more room for other plants.

Reasons To Grow Vertically

Growing vegetables vertically also saves time and space leaving more area for other veggies that don’t do well with vining.

 Harvest and maintenance go faster because you can see exactly where the veggies are.

Fungal diseases are also less likely to affect upward-bound plants because of the improved air circulation around the foliage.

We grow as many vegetables as we use that are vining plants such as cucumbers, tomatoes, peppers, and cantaloupes.

We even planted our cucumbers outside the house in a flower bed. We built a wooden A-shaped frame and planted five plants inside the A-frame. The cucumbers loved it!

They climbed up the A-frame and then attached their tendrils to the window screen which was right above the frame. We didn’t plan on the vine climbing to the window screen.

Here Are Some Pictures Of Our Vertical Plants

Here’s a picture looking out at the cucumber from inside. The picture looks a bit grainey but that’s because we’re looking through the window screen.

Here the vines reached out and attached to the fence. We didn’t see one of the cukes growing between the house and the fence where it got lodged. Here’s a picture of that poor cuke.


Here’s a picture of the A-frame we use for the cucumbers.

My husband built the A-frame himself. It can be taken down and folded nicely for winter storage.

Types of Vertical Supports

  • Tripods and teepees
  • A-frames
  • Posts and poles
  • Trellis, netting or fence
  • Wooden or wire cages

We always have abundant growth of tomatoes and peppers using wire cages. We use wire cages for these plants since we have really good luck with them using wire cages.  We put black ground cover around the plants to hold the moisture in the ground.

Try some vertical planting next gardening season. I’m sure you’ll love it.

Happy gardening!

Eve